
Serhii Sokolenko
How to setup a managed Iceberg catalog using Snowflake Open Catalog

We are continuing our series of posts exploring building an open, multi-engine lakehouse based on Apache Iceberg, a fast-growing table format for data lakehouses. If you want to learn what lakehouses are, read the first post of the series.
All six posts of this 6-part series are now available:
Part 1: Building Open, Multi-Engine Lakehouse with S3 and Python
Part 2: How Iceberg stores table data and metadata
Part 3: Picking Snowflake Open Catalog as a managed Iceberg catalog
Part 4: How to create S3 buckets to store your lakehouse
Part 5: How to set up a managed Iceberg catalog using Snowflake Open Catalog
Part 6: How to write Iceberg tables using PyArrow and analyze them using Polars
We aim to use Python (and Python libraries like PyIceberg, PyArrow, and Polars) as the main query engine for our lakehouse but allowing other engines like Spark and DuckDB too. A central component of an Iceberg lakehouse is an Iceberg catalog, which coordinates the various engines that will work on our data. For our Iceberg catalog, we prefer using managed services over self-managed servers.
In our previous post, we reviewed the available Iceberg catalogs and decided to try Snowflake's Open Catalog. In this post, we walk you through setting it up.
Here is what we will do:
Create a new Snowflake Open Catalog account
Create a managed Iceberg catalog
Set up Python application access to the Iceberg catalog
Manage permissions in the Iceberg catalog
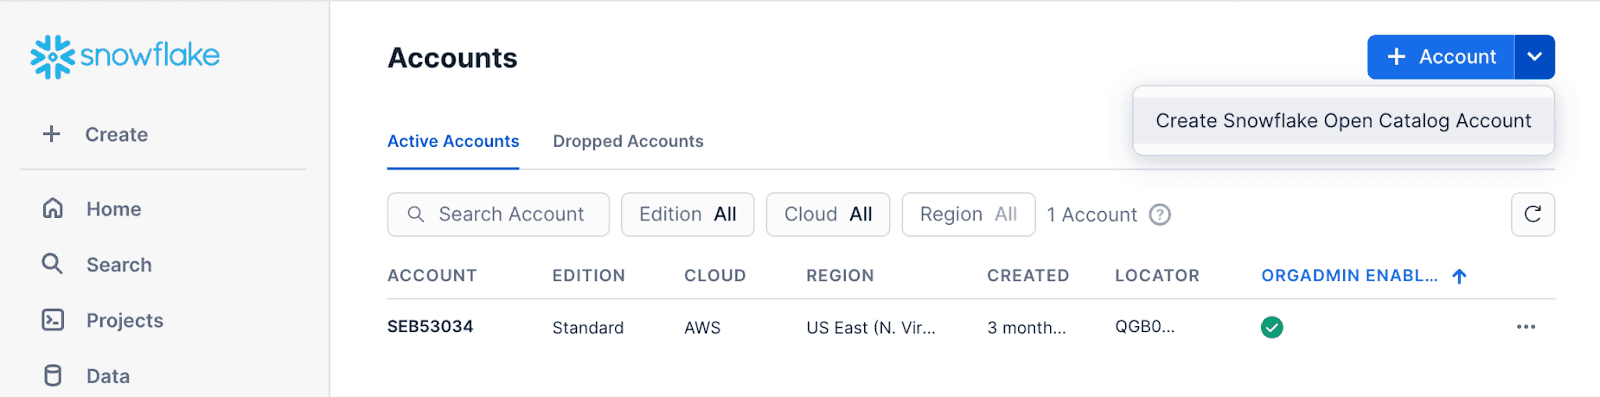
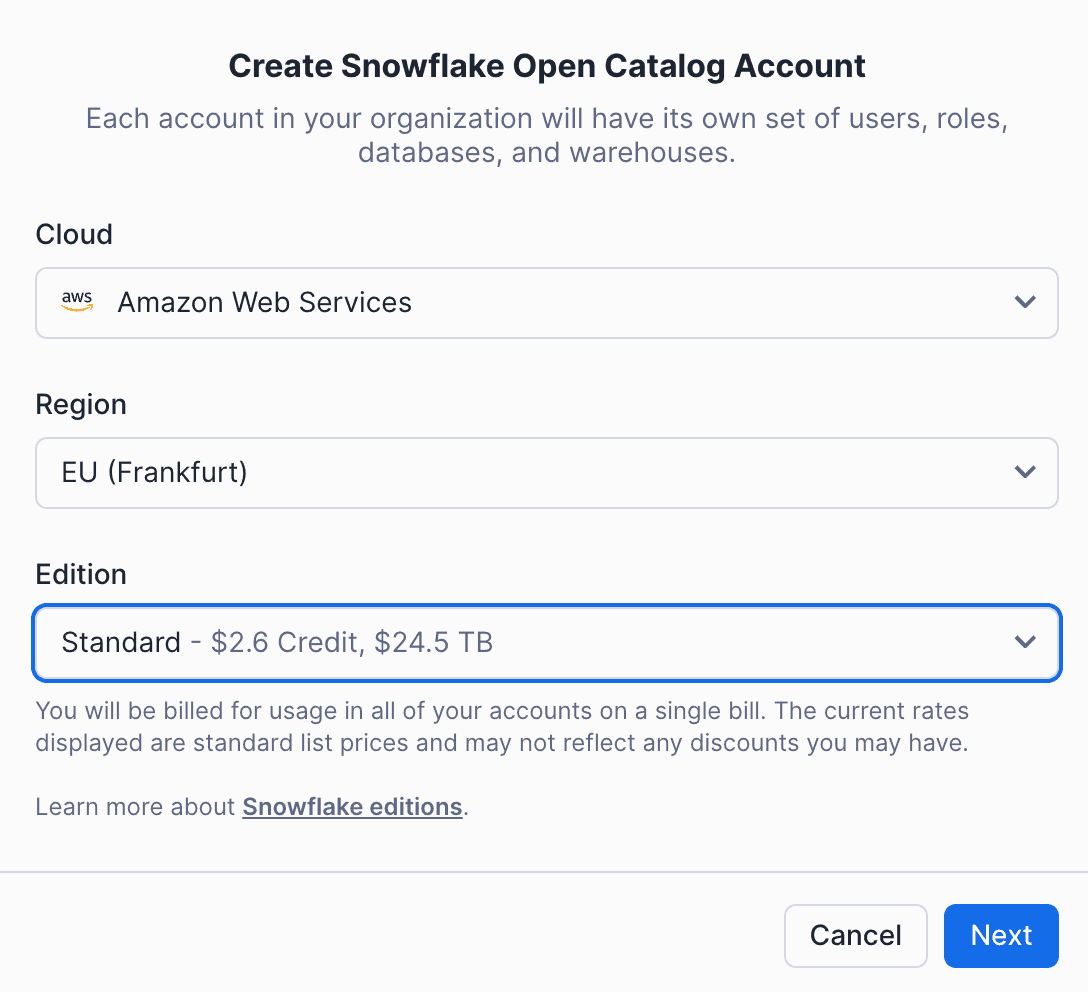
Create a new account in Snowflake’s Open Catalog service
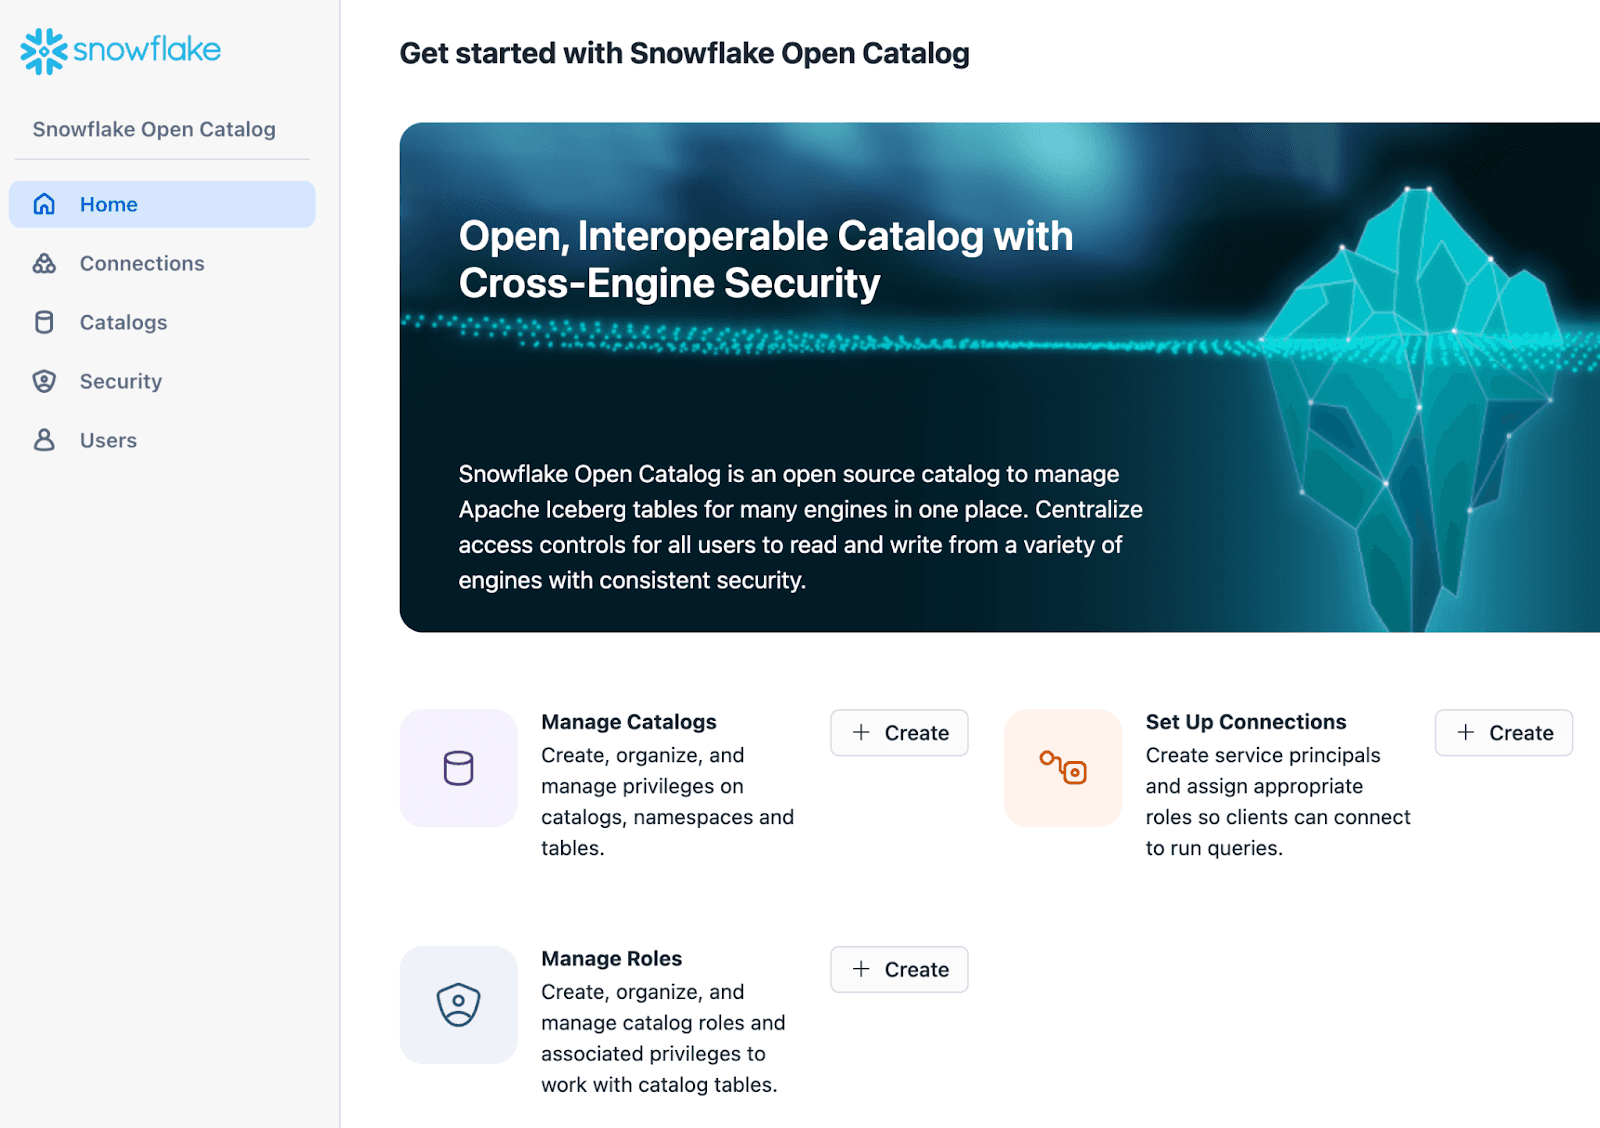
First, create a new account with the Snowflake Open Catalog managed service by following this guide. The UI of Open Catalog looks suspiciously similar to a regular Snowflake UI, except that you don't see any of the data warehouse functionality.
You should place the Open Catalog account in the cloud and the region where your Iceberg tables will reside. This post of our series discusses creating S3 buckets for the lakehouse table.
Note the locator URL of your account. In our case, it looks like https://<xyz>.eu-central-1.snowflakecomputing.com
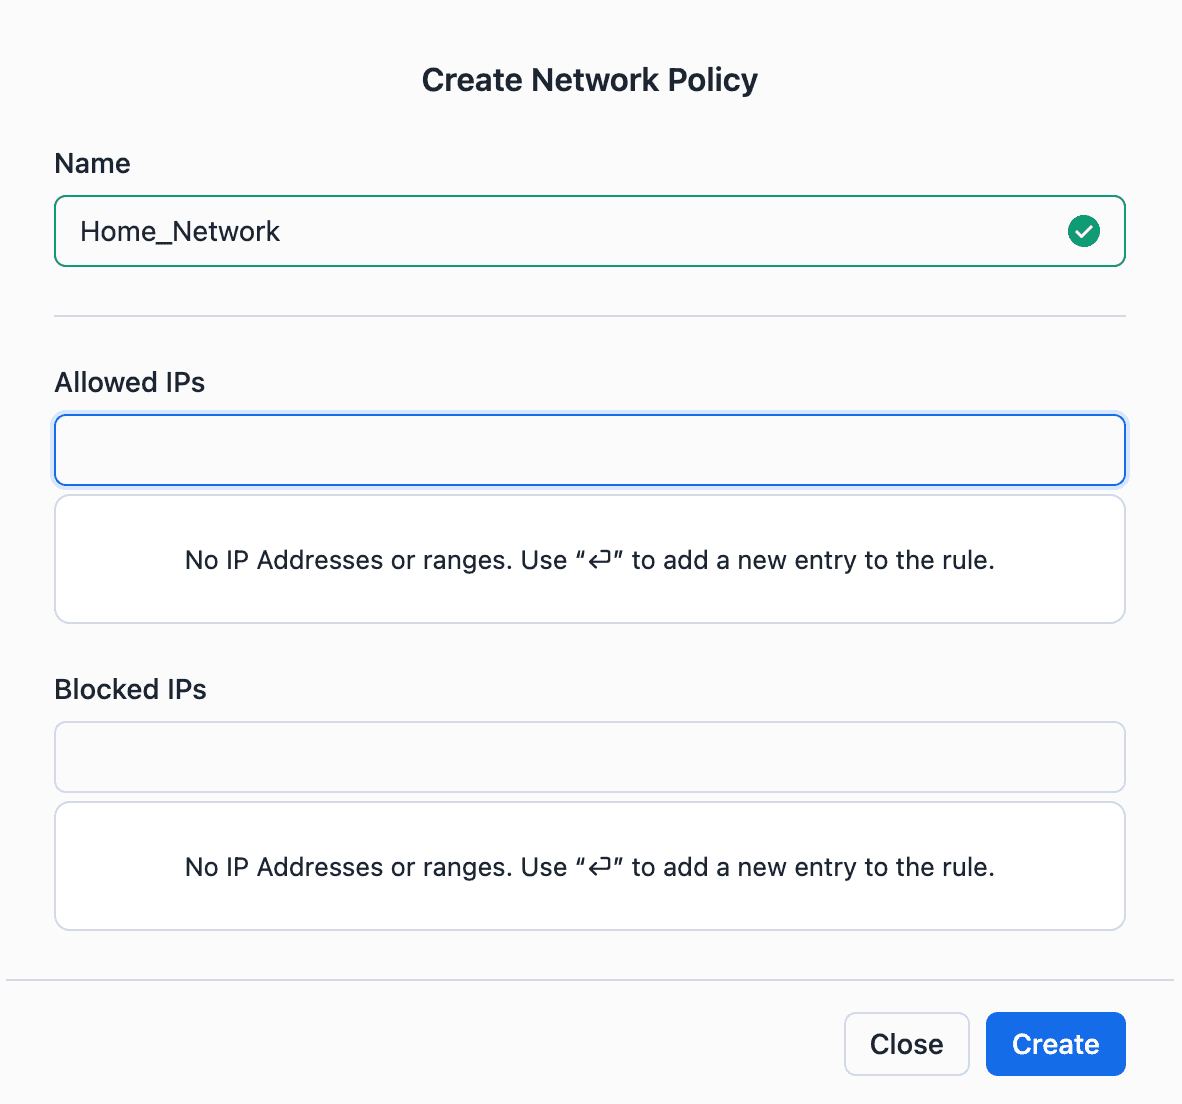
After this year's "Security Incident", Snowflake is serious about security, so they will first recommend enrolling your users into Multi-Factor Authentication (MFA) and setting up network policies to restrict access to the catalog. Network policies are based on IP ranges, just like how you secure your VPCs on Amazon. We will let you decide when you want to add these network access policies - now or after you go through the rest of this tutorial.
Create a managed Iceberg catalog
In the next step, create a new Iceberg catalog in the Open Catalog account.
This Snowflake guide explains it best, but we also wanted to share a few observations.
By the end of that process, you will have:
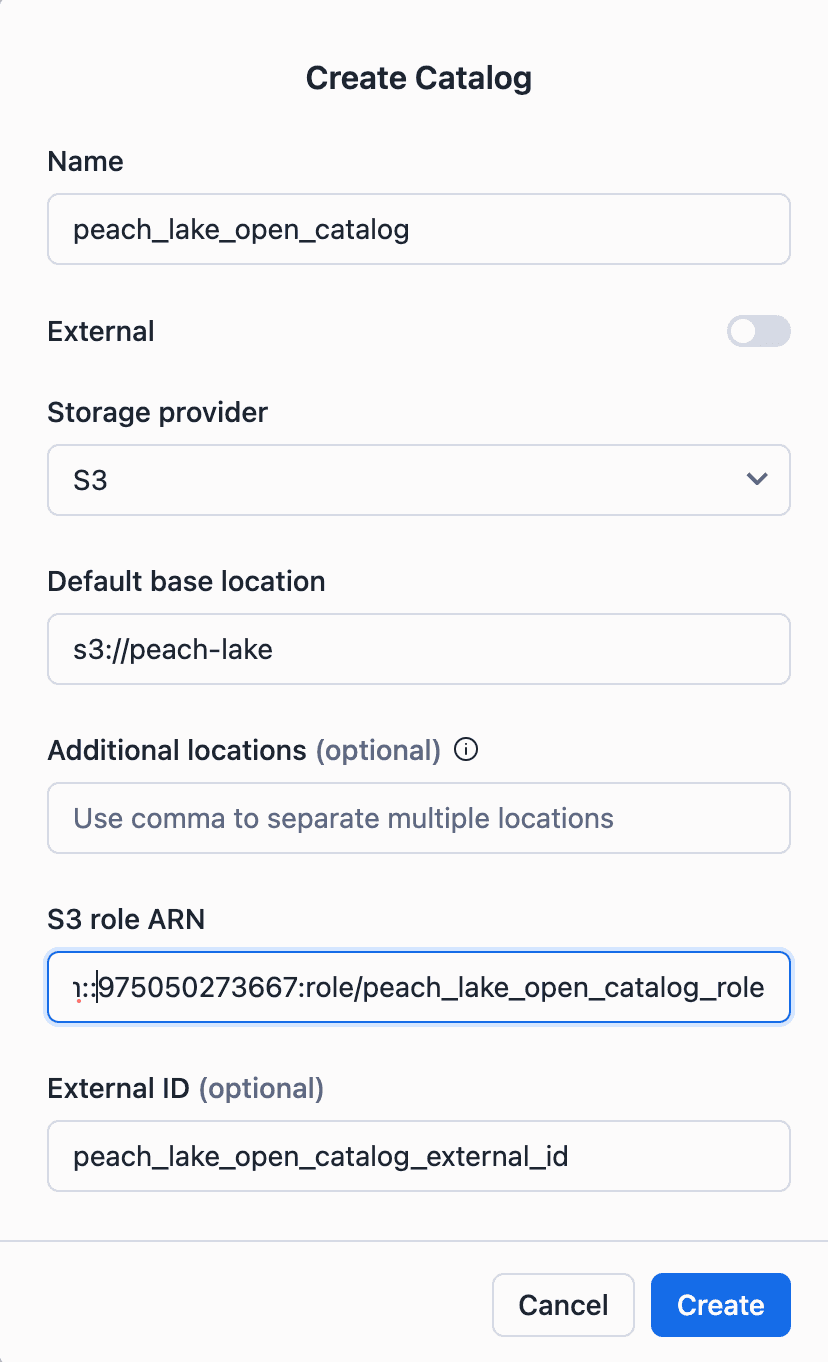
1. An AWS IAM Policy that controls access to your S3 lakehouse bucket. We called it "peach_lake_open_catalog_access" because our lakehouse is called "peach_lake."
2. A new IAM Role with an external ID that the Snowflake catalog will use to access AWS resources.
For example, we called our artifacts:
External ID: peach_lake_open_catalog_external_id
IAM Role Name: peach_lake_open_catalog_role
ARN of our role "arn:aws:iam::1234567890:role/peach_lake_open_catalog_role"
3. A new Iceberg catalog in your Open Catalog account.
In our case, we called the catalog "peach_lake_open_catalog."
As you go through this last step, you will enter the S3 URI of your lakehouse storage bucket here.
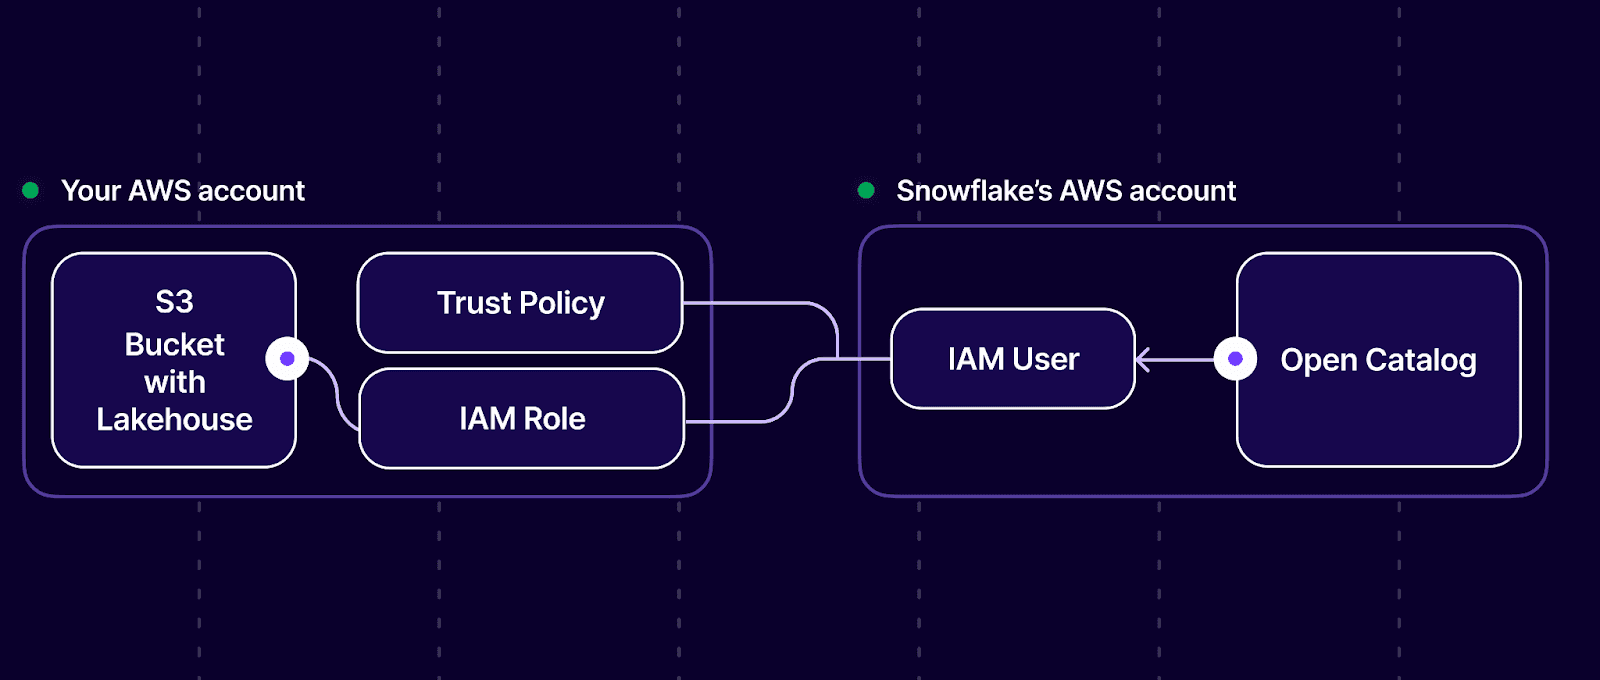
4. Open Catalog will create a new IAM User (in their own AWS account, not in your account!). You will then establish a Trust Policy allowing this Snowflake user to assume the role you created in your account ("peach_lake_open_catalog_role") and, therefore, access objects in your S3 bucket.
One more time. An IAM user in Snowflake's AWS account will assume the role in your AWS account, allowing Snowflake to manage the data in your S3 bucket. This is how the Snowflake-managed service can do what it is supposed to do. Now you know how the sausage is being made.
Set up your Python application’s access to the Iceberg catalog
In this step, the Open Catalog UI confused us quite a bit.
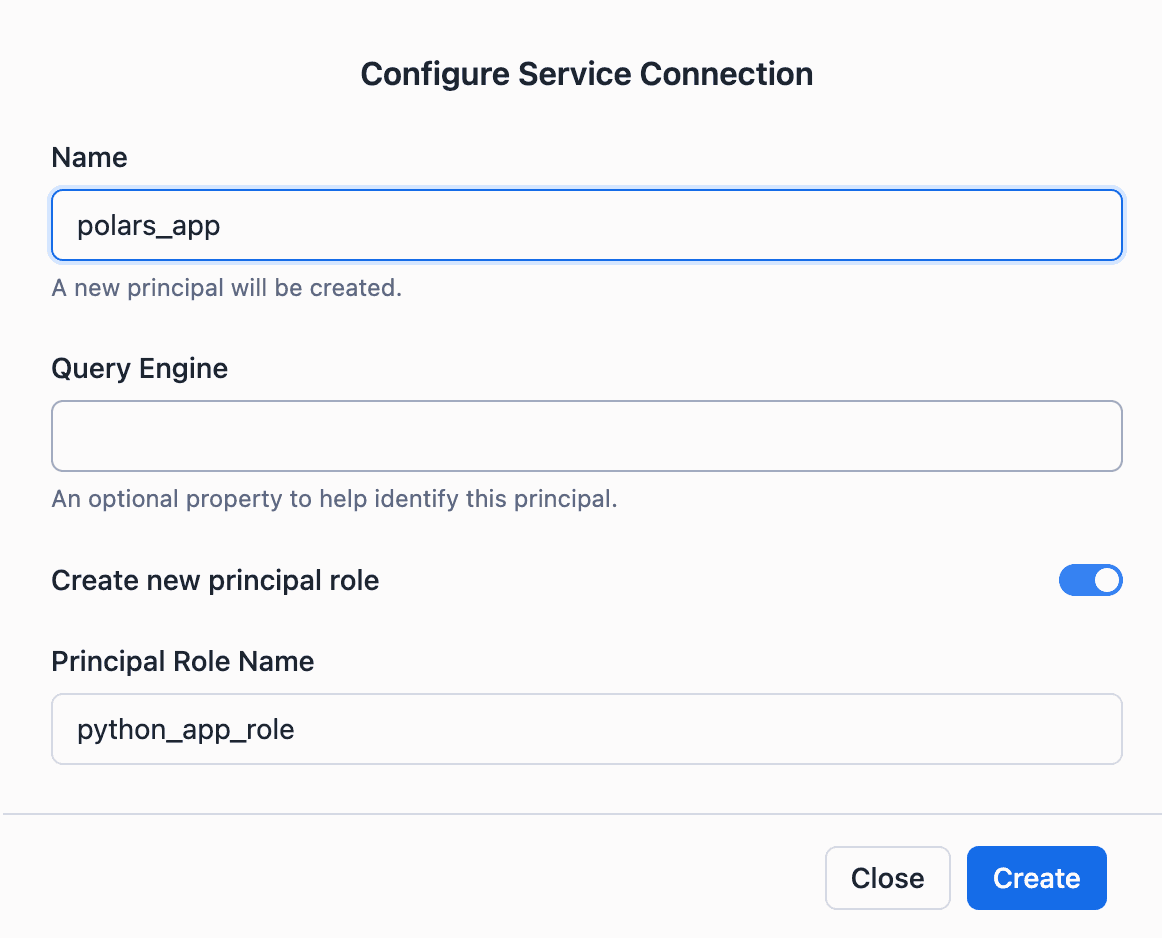
Our task is simple - we have a data application written in Python that needs a service principal (a special user to be used by an application and not a human user) so that this application can access the Iceberg catalog.
When creating such a service principal, Open Catalog uses two terms interchangeably: service principal and service connection.
To create a service principal, you have to click on the "Connections" sidebar menu and Add a Connection (click on + Connection). But inside that page, you will be told that what you are creating is a "principal," and once you exit the page, you will find the newly created "thing" under the "Principals" tab. Very confusing.
Follow this guide to get it over with.
By the end of this step, you will have a new service principal (or service connection, whatever you prefer). You can also create a new service principal role or use an existing one. Principal roles are used to group multiple principals so that permissions to data can be defined based on these roles (in a system called Role-Based Access Control, or RBAC).
In our case, we called the entities:
Service Principal: polars_app
Service Principal Role: python_app_role
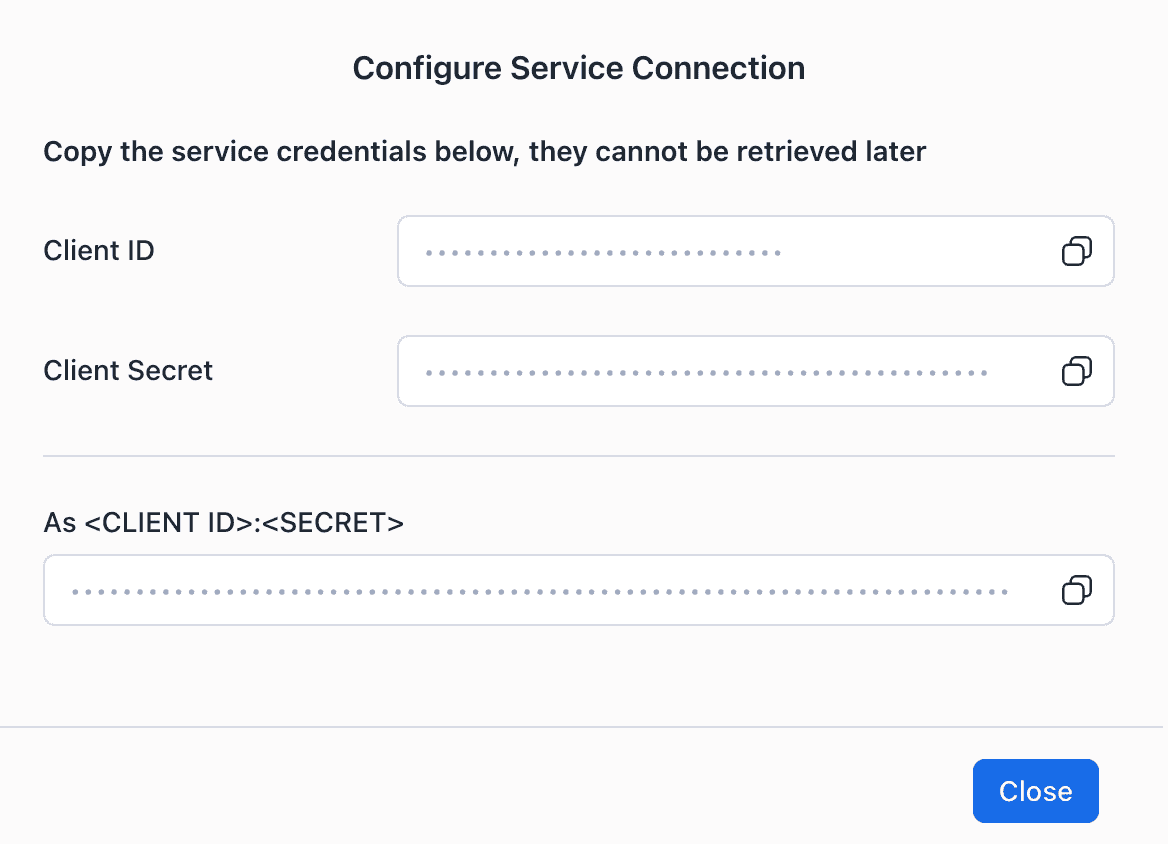
At this point, you will also get the chance to save the ID and the Secret of the Service Principal. You will use them as credentials in your data app to access the Iceberg catalog.
Manage role-based permissions in the Iceberg catalog
Open Catalog manages permissions to its various capabilities by setting up another set of roles called the catalog roles. You create a catalog role, assign privileges to that catalog role, and then grant that catalog role to a principal role. All principals in the principal role get the privileges of the catalog role.
Confusing? This is Role-Based Access Control for you, where everything is managed via roles (vs. Groups, like in some other systems). Think of principal roles as groups of principals (users) and Catalog roles as sets of data object access privileges. Don't worry; you will get used to it.
The granularity of privileges can be on the level of the entire catalog, a namespace in the catalog, and a table in a namespace.
To create a catalog role, follow this guide (it's straightforward).

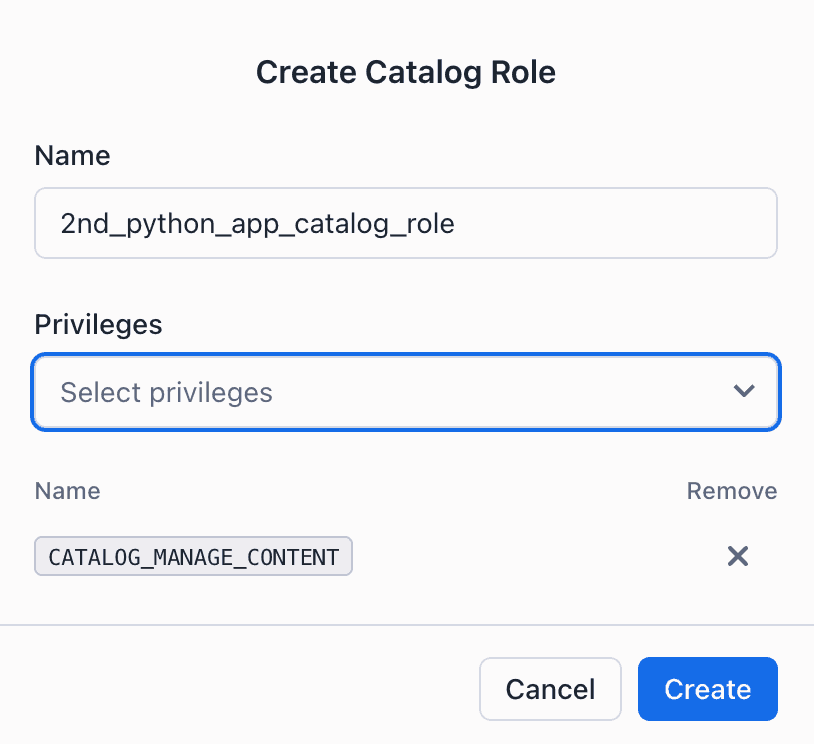
The privilege we need for our python_app_role is CATALOG_MANAGE_CONTENT. This broad privilege allows service principals to read and write table data and change table metadata in the catalog.
You will first create a catalog role and pick all privileges.
Then, you click on "Grant to Principal Role" and tell Open Catalog which principal role should be granted that catalog role.
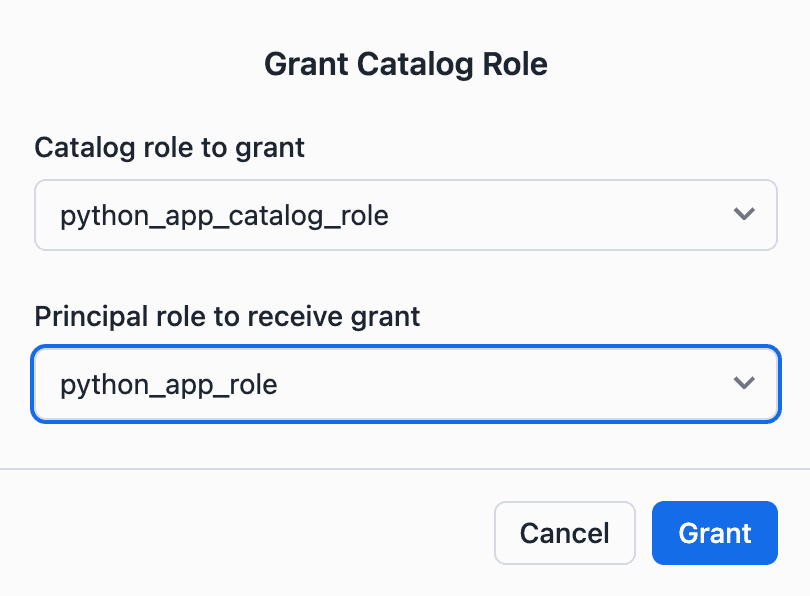
This means all service principals with the python_app_role (e.g., polars_app) now have the CATALOG_MANAGE_CONTENT privilege.
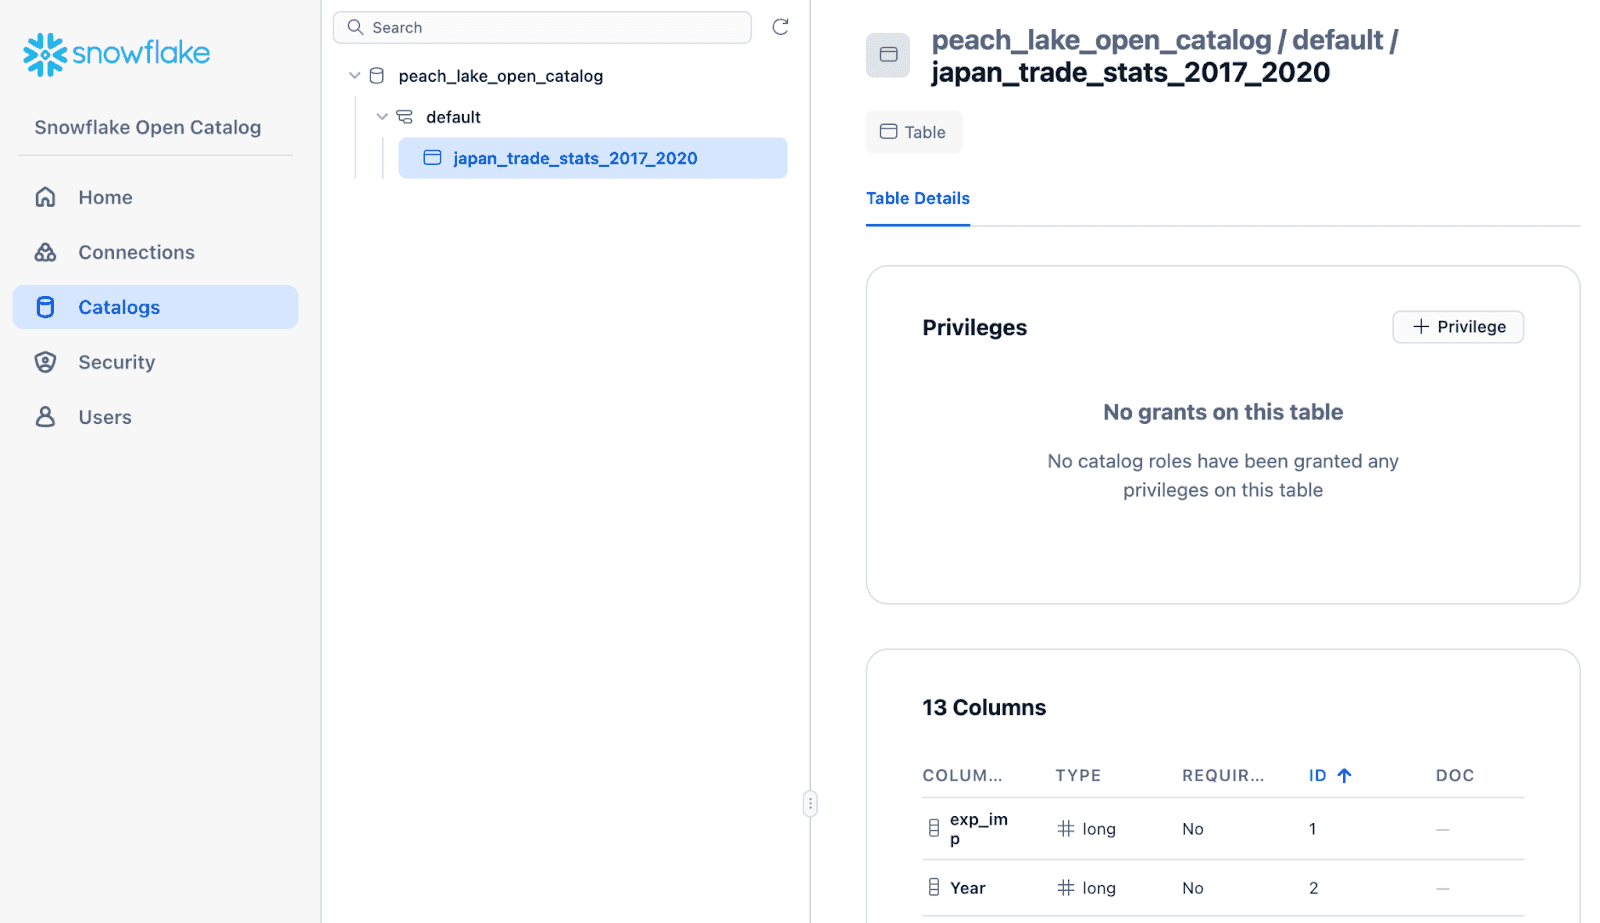
Later, we will create a new namespace in this catalog and a table within the namespace. When we return to the Open Catalog UI, we will see that we can add privileges at each level of the catalog tree - to catalogs, namespaces, and tables. Find each object's Privileges section and click "+ Privilege."
Our Iceberg catalog is now functional, so we can get to the fun stuff - writing and reading Iceberg tables using Python libraries only, with no Spark, DuckDB, or Snowflake involved!
Next Steps
If you liked our step-by-step instructions for setting up a Snowflake Open Catalog, follow us on LinkedIn or sign up for our Substack newsletter to get notified when we publish the last post of our series.
In that post, we will tie everything together and show how to use standard Python tools (PyArrow and Polars) to run data applications on top of an S3-based open lakehouse.